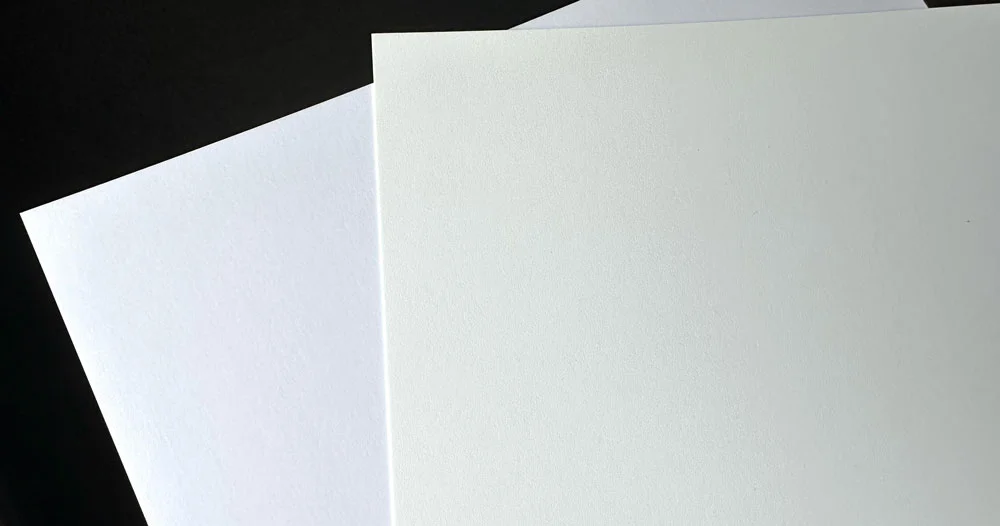
When it comes to printing photographs and fine art, one critical factor that often gets overlooked is the whitepoint of the paper. The whitepoint, or the colour of the white base of the paper, significantly affects the final output of your images. This guide aims to help photographers and artists understand the differences in whitepoints for photographic and fine art papers, enabling them to make more informed choices for their work.
What is Whitepoint?
The whitepoint of a paper refers to the colour tone of its base white, which can range from a warmer, more natural yellowish tone to a cooler, more bright white bluish tone. Understanding this characteristic is crucial because it impacts how colours and details are perceived in the final print.
Photographic Papers
Characteristics of Photographic Papers
Photographic papers are specifically designed for printing photographs, offering a range of finishes like glossy, matte, and satin. These papers are optimised for high contrast and sharpness, ensuring that details in photos are rendered accurately.
Whitepoints in Photographic Papers
Photographic papers typically have a cooler whitepoint, often appearing more blue. This cooler tone enhances the perceived sharpness and contrast of images, making colours appear more vibrant and details more defined. Cooler whitepoints are particularly beneficial for:
- Portraits: Enhances skin tones by providing a clean and crisp look.
- Landscapes: Makes skies and water appear more vivid and striking.
- Black and White Photography: Increases contrast, adding depth to grayscale images.
However, it’s crucial to note that a cooler whitepoint can sometimes make warm colours (reds, yellows, oranges) appear less saturated or slightly off. Therefore, photographers should consider the nature of their work when choosing photographic paper.
Fine Art Papers
Characteristics of Fine Art Papers
Fine art papers are designed for artists who want to reproduce paintings, illustrations, and other artwork. These papers often have a textured surface and are made from high-quality materials like cotton rag, providing longevity and a luxurious feel.
Whitepoints in Fine Art Papers
Fine art papers usually have a warmer whitepoint, often appearing more yellow. This warmer tone is closer to the traditional white of classic art papers and can enhance the depth and richness of colours in fine art reproductions. Warmer whitepoints are advantageous for:
- Paintings and Illustrations: Adds a sense of warmth and authenticity, mimicking the appearance of original artworks.
- Historical Reproductions: Creates a vintage or timeless feel, which is ideal for reproducing historical documents or artwork.
- Soft and Subtle Tones: Enhances the softness and subtlety of pastel colours, making them appear more natural.
While a warmer whitepoint can enrich certain colours, it may reduce the perceived sharpness and contrast compared to cooler whitepoints. Artists need to balance the desired aesthetic with the technical requirements of their work.
Choosing the Right Whitepoint for Your Work
Consider the Subject Matter
The subject matter of your work is a crucial factor in determining the appropriate whitepoint. For instance:
- Portrait Photography: A cooler whitepoint can highlight details and add a contemporary feel, but if you’re aiming for a more classic or natural look, a neutral to warm whitepoint might be better.
- Fine Art Reproductions: Warmer whitepoints generally provide a more authentic look, especially for classical or vintage pieces.
Evaluate the Display Environment
The lighting conditions where the final print will be displayed also play a role in choosing the right whitepoint. Prints viewed under natural daylight may benefit from a cooler whitepoint, while those displayed under incandescent or warm lighting may look better with a warmer whitepoint.
Ultimately, personal preference and artistic intent are paramount. Some artists and photographers might prefer the crispness of cooler whitepoints, while others might lean towards the warmth and richness offered by warmer whitepoints. Experimenting with different papers and printing a few test samples can help you decide which whitepoint best suits your vision.
Practical Tips for Working with Different Whitepoints
Personal Preference and Artistic Intent
- Calibrate Your Monitor: Ensure your monitor is calibrated to the whitepoint of the paper you intend to use. This helps achieve more accurate colour matching between your screen and the final print.
- Soft Proofing: Use soft proofing techniques in your editing software to simulate how your images will look on different papers. This allows you to make necessary adjustments before printing.
- Print Test Samples: Print small test samples on different papers to see how the whitepoint affects your work. Compare these samples under various lighting conditions to determine the best match.
- Consider Paper Texture: The texture of fine art papers can interact with the whitepoint, influencing the final appearance. Smooth papers tend to show colours more vividly, while textured papers can add depth and dimension.
Conclusion
Understanding the differences in whitepoints between photographic and fine art papers is essential for achieving the best possible results in your prints. Photographic papers with cooler whitepoints can enhance sharpness and vibrancy, making them ideal for modern and dynamic images. Fine art papers with warmer whitepoints provide a classic and authentic feel, perfect for reproducing traditional artwork and creating a sense of warmth.
By considering the subject matter, display environment, and your artistic intent, you can make informed decisions about the right whitepoint for your work. Experimentation and testing are key to finding the perfect match, ensuring that your printed images and artworks reflect your creative vision accurately.


